
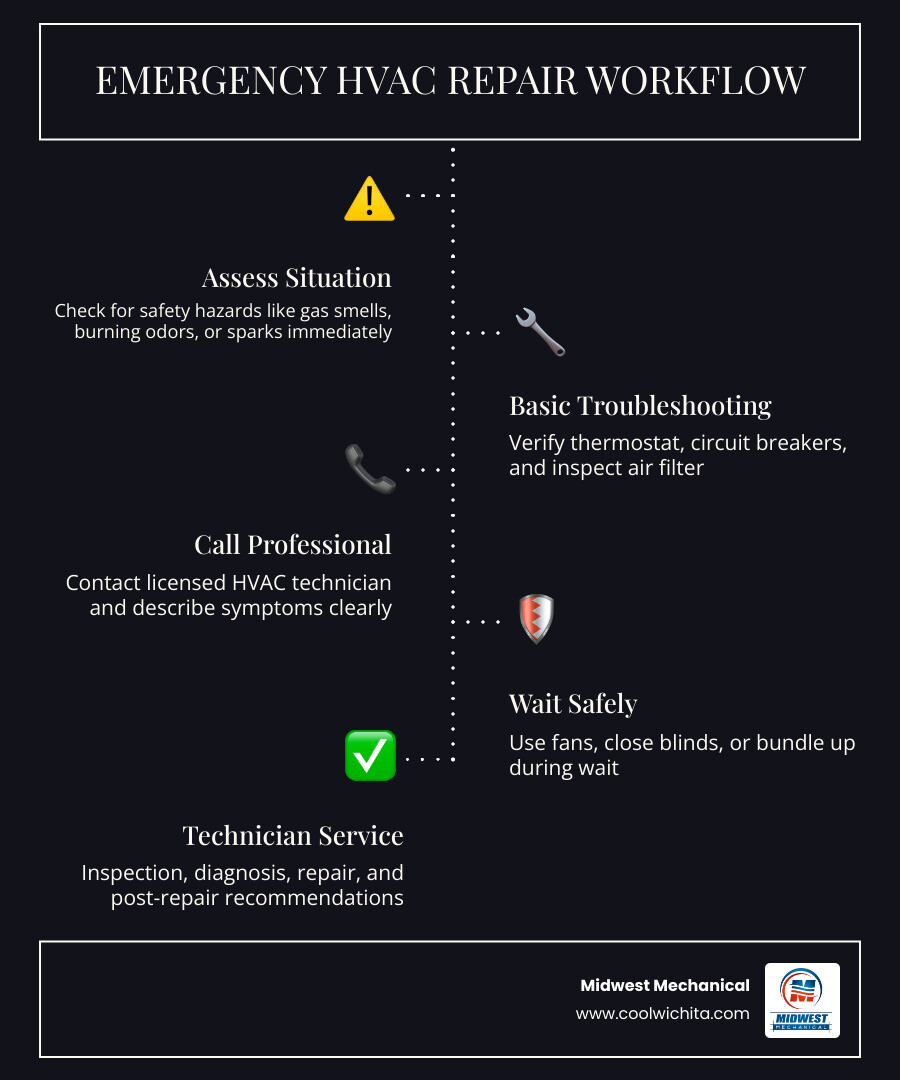
Spot AC trouble signs early
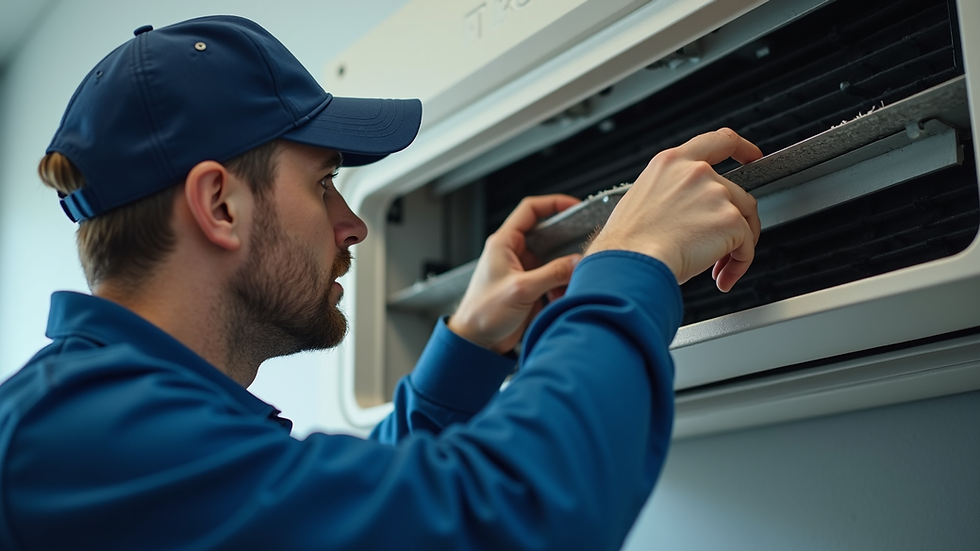
Your air conditioner works silently most of the year, but it will usually announce its problems with specific symptoms before it completely fails. Catching these early signs during your HVAC maintenance routine can prevent a total breakdown on the hottest day of the summer. Watch for weak airflow, warm air, or strange noises, as these are the most common indicators that your system needs attention.
Weak airflow If air feels like a gentle breeze instead of a strong stream coming from your vents, the issue is often simple. A clogged air filter is the most frequent culprit, restricting the air your system needs to cool your home. You can fix this yourself by replacing the filter with the correct size. If the airflow remains weak after changing the filter, the problem might be a blocked duct or a failing blower motor, which requires a professional technician to inspect.
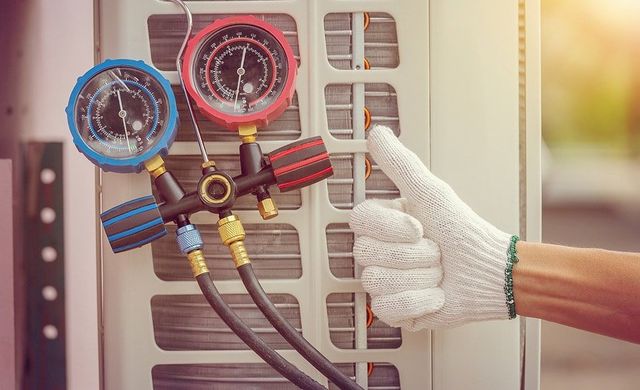
Warm air from vents Your AC should blow air that is significantly cooler than the room temperature. If the air feels only slightly cool or warm, check your thermostat settings first to ensure it is set to "cool" and not "fan" or "heat." If the settings are correct, the unit might be low on refrigerant or have a dirty evaporator coil. Refrigerant leaks are not DIY fixes; you need a licensed HVAC professional to locate the leak, repair it, and recharge the system safely.
Strange noises AC units make some noise when they start up, but grinding, squealing, or banging sounds are red flags. A squealing noise often points to a loose or worn-out belt in older units, or a failing motor bearing. Rattling sounds can indicate loose panels or debris inside the unit. Banging noises are more serious and may suggest a broken component inside the compressor. If you hear any of these unusual sounds, turn off the unit immediately to prevent further damage and call for repair.
Callout: If your unit is over 10 years old and struggling, consider the $5,000 rule to decide between repair and replacement.
Change the air filter first
Your HVAC system struggles to breathe when the filter clogs. You might notice weak airflow from vents, a slight increase in your energy bill, or the unit cycling on and off more frequently than usual. Replacing the filter is the single most effective DIY maintenance step you can take to restore airflow and keep your system running efficiently.
Think of the filter as the system's lungs. When they are blocked, the fan has to work harder to pull air through, which strains the motor and reduces cooling capacity. A clean filter ensures that dust and debris stay out of the delicate coils and blower, preventing long-term damage and maintaining indoor air quality.
Choose the right MERV rating
Not all filters are created equal. The Minimum Efficiency Reporting Value (MERV) indicates how well the filter captures particles. For most residential HVAC maintenance tasks, a MERV 8 to 11 filter offers the best balance of filtration and airflow. Higher ratings (MERV 13+) capture finer particles like viruses and smoke but can restrict airflow if your system isn't designed for them, potentially causing frozen coils or motor burnout.
| MERV Rating | Best For | Airflow Impact |
|---|---|---|
| MERV 1-4 | Basic dust protection | Minimal |
| MERV 8-11 | Standard home HVAC maintenance | Low to Moderate |
| MERV 13+ | Allergy sufferers, high filtration | High (check manual) |
Always check your unit's manual or the label on your old filter to confirm the size and recommended MERV rating. Installing a filter with too high a rating for your specific system can do more harm than good.
Set a replacement schedule
Frequency depends on usage and household factors. For a standard home with no pets or allergies, change the filter every 90 days. If you have pets, smokers, or residents with allergies, aim for every 60 days. During peak summer months, when the system runs constantly, monthly checks are wise.
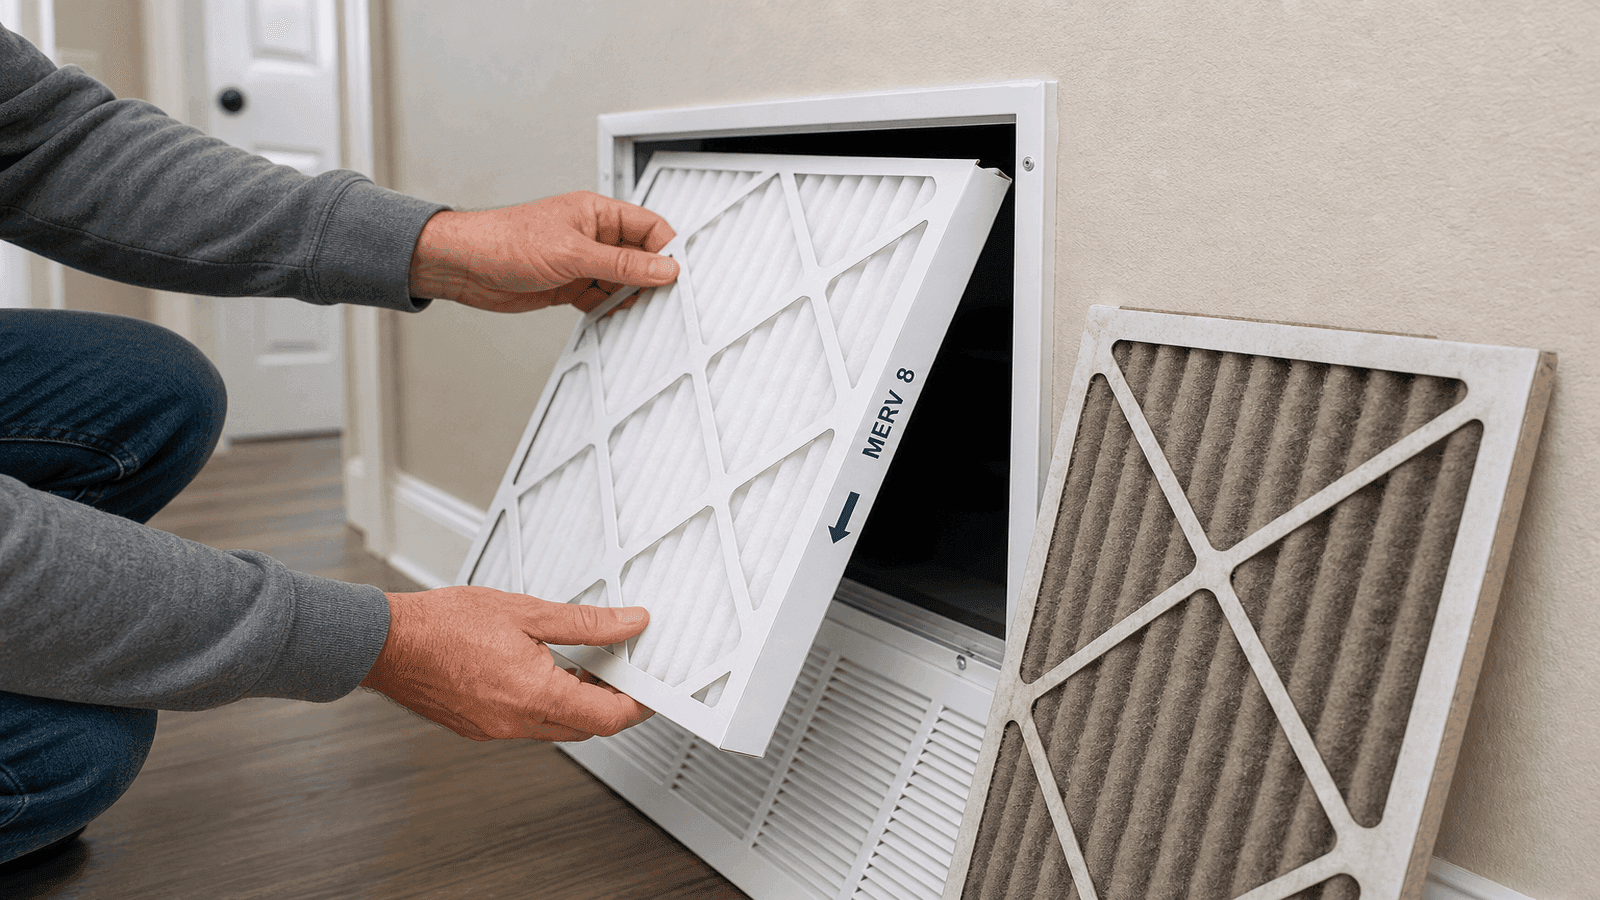
How to replace it
- Turn off the HVAC system at the thermostat or breaker to prevent the fan from pulling in debris.
- Locate the filter slot. It is typically found in the return air duct near the air handler or in a wall/ceiling grille.
- Slide out the old filter. Note the direction of the airflow arrows printed on the frame.
- Insert the new filter with the arrows pointing toward the air handler (into the ductwork). This ensures air flows through the filter media correctly.
- Secure the slot and turn the system back on.
Check your owner's manual or look for a access panel near the air handler unit. It is often in the return air ductwork or a dedicated slot in a wall or ceiling grille. Remove the cover carefully.
Slide the old filter out. Note the direction of the airflow arrows printed on the frame. This tells you which way the new filter needs to point. If the filter is black with dust, it's time for a change.
Align the new filter with the slot. Ensure the airflow arrows point toward the air handler (into the ductwork). Push it in firmly so air doesn't bypass the filter around the edges.
By keeping this simple task on your HVAC maintenance checklist, you ensure your system operates at peak efficiency, lowering energy costs and extending the life of your unit.
Clear debris around the outdoor unit
If your HVAC maintenance routine skips the area right outside your home, the system pays for it in efficiency. Leaves, grass clippings, and dust act like a blanket over the condenser coils, trapping heat instead of releasing it. When the unit can't shed heat, the compressor works harder, driving up your electric bill and shortening the lifespan of the equipment. Keeping the perimeter clear is the single most effective way to prevent overheating during peak summer months.
Start by turning off power to the unit at the disconnect box or breaker panel. This is a safety non-negotiable before you touch any part of the outdoor condenser. Once the power is cut, remove the top grill or fan assembly if your model allows it. This gives you access to the fins underneath, which are often packed with the most stubborn debris.
Trim back any shrubs, vines, or tall grass to maintain at least two feet of space on all sides of the unit. This clearance acts as the system's breathing room, ensuring airflow isn't restricted. A tight squeeze forces the fan to pull air through a smaller area, increasing resistance and strain on the motor.
Use a garden hose with a gentle spray nozzle to wash away loose dirt and pollen from the exterior fins. Always spray from the inside out if possible, or straight down, to avoid bending the delicate aluminum fins. High-pressure washers can damage the coil structure, compromising heat transfer efficiency.
Inspect the fins for any bends or crushes caused by wind-blown debris or accidental impacts. Use a fin comb to gently straighten them, restoring proper airflow channels. Bent fins create turbulence and reduce the surface area available for heat exchange, making the unit work harder to cool your home.
Reassemble the unit and restore power only after everything is completely dry. A clean, unobstructed outdoor unit is the foundation of effective HVAC maintenance, ensuring your system runs quietly and efficiently when you need it most.
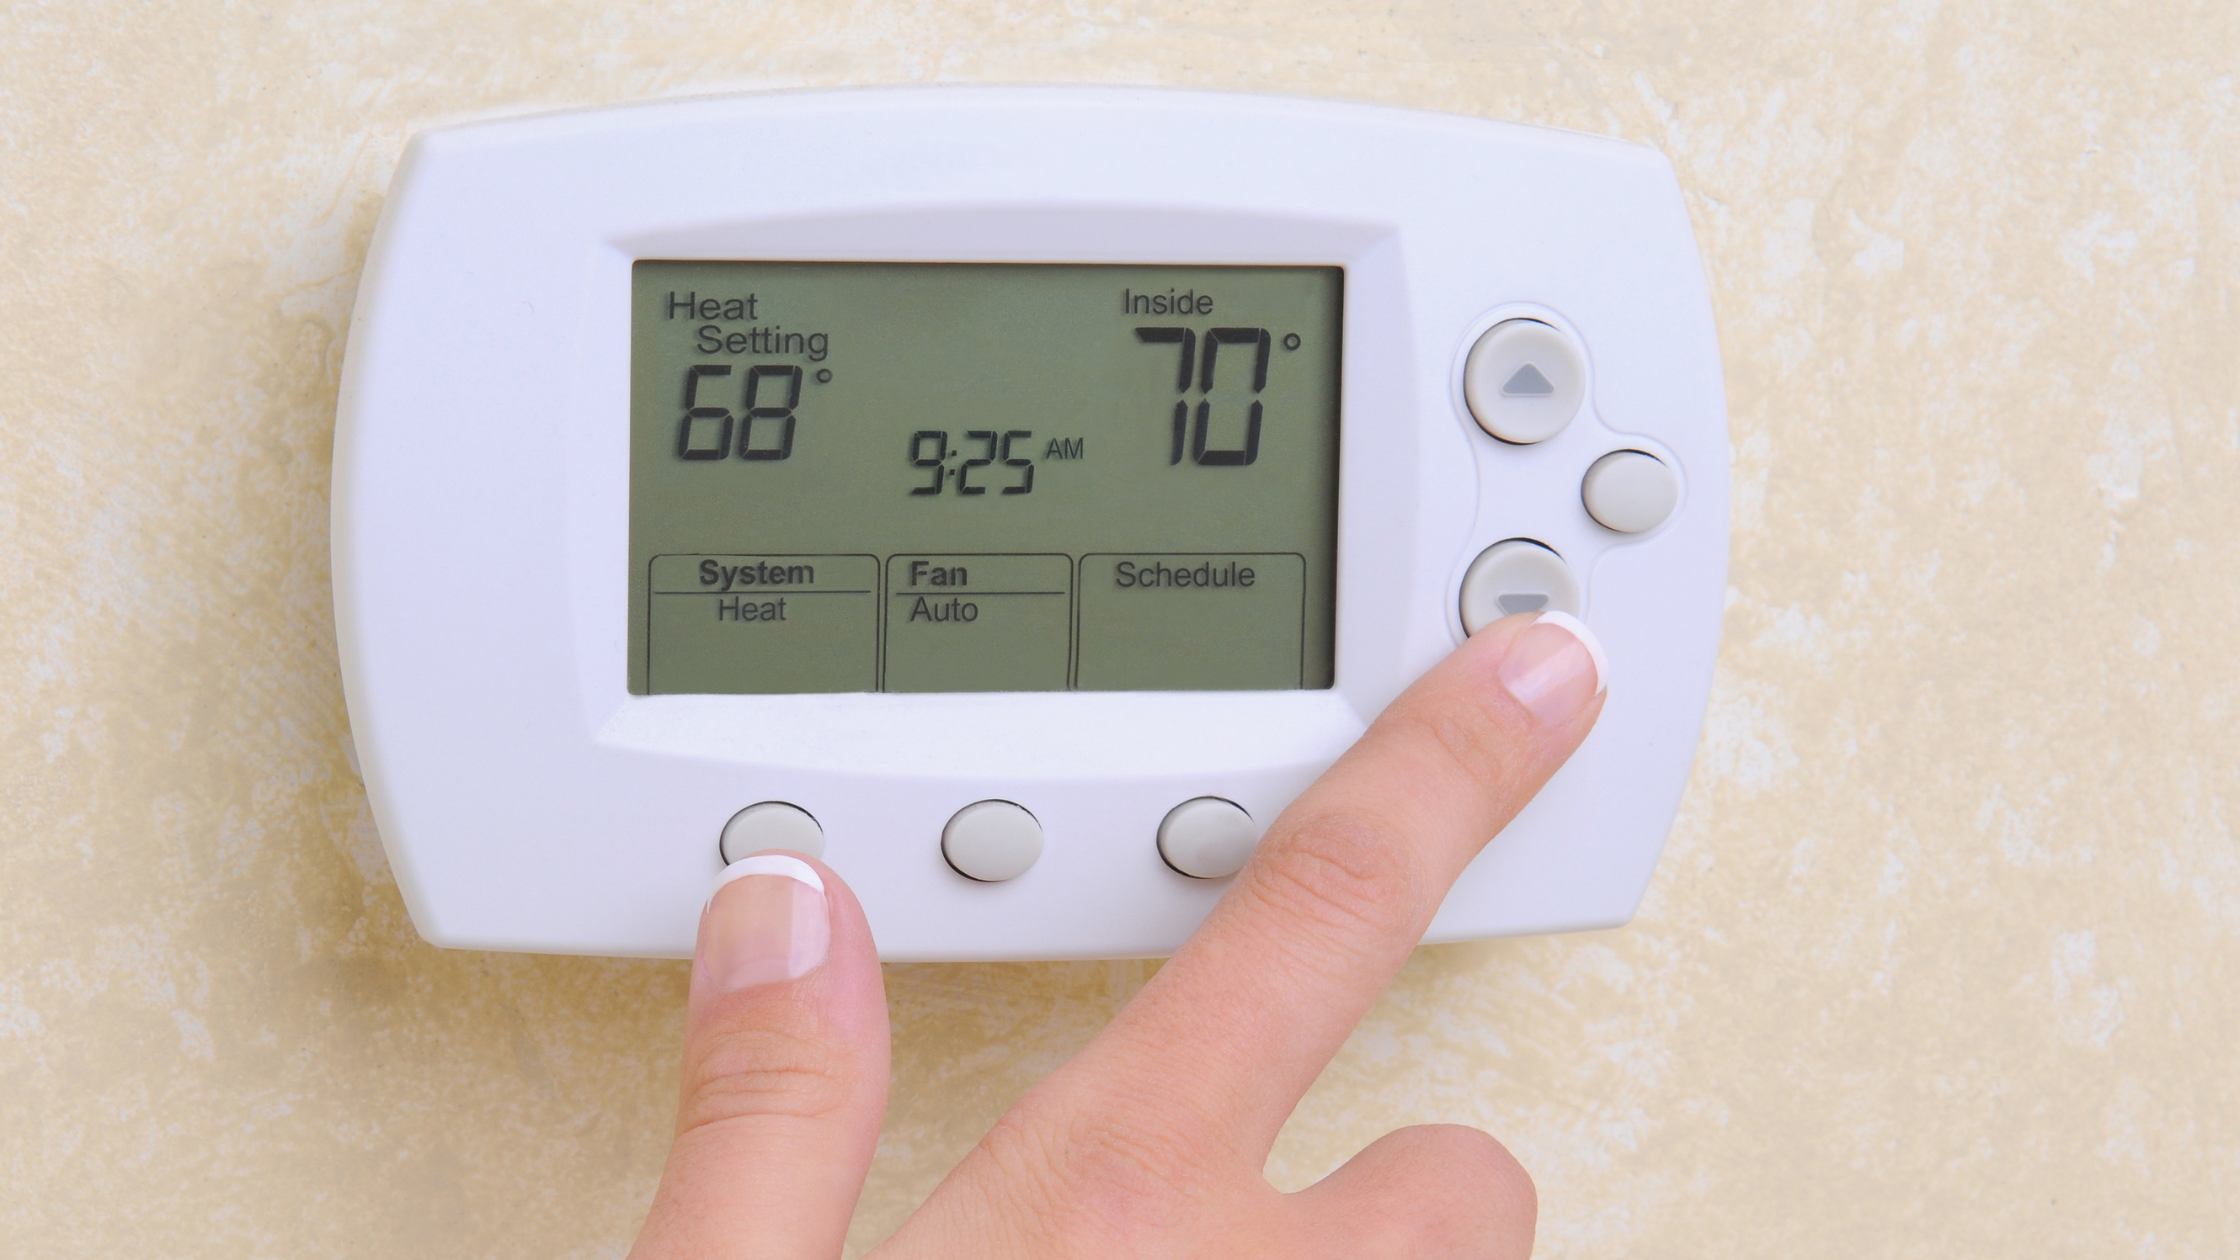
Check thermostat settings and calibration
Your HVAC maintenance routine starts at the wall. If the system runs longer than usual or the rooms feel unevenly cooled, the thermostat is often the first suspect. A dirty sensor or a loose wire can trick the unit into thinking the house is colder or hotter than it actually is, forcing the compressor to work overtime.
Start by verifying the accuracy. Clean the exterior of the thermostat with a soft cloth to remove dust that can clog sensors. Then, place a separate, reliable thermometer in the room near the unit. Compare the reading after 15 minutes. If the difference is more than two degrees, the calibration is off. You can often fix this by adjusting the calibration setting in the menu or replacing the batteries, which can cause erratic behavior as they drain.
Once calibrated, check your temperature settings against the "20-degree rule." This guideline suggests you should never set your thermostat more than 20 degrees below the outdoor temperature. For example, if it is 95°F outside, do not set the AC to 70°F or lower. Pushing the system beyond this threshold strains the compressor and increases the risk of breakdown without significantly improving comfort.
Proper calibration ensures your HVAC maintenance efforts translate to actual energy savings. When the thermostat reads accurately, the system cycles on and off at the right times, preserving the equipment and keeping utility bills predictable.
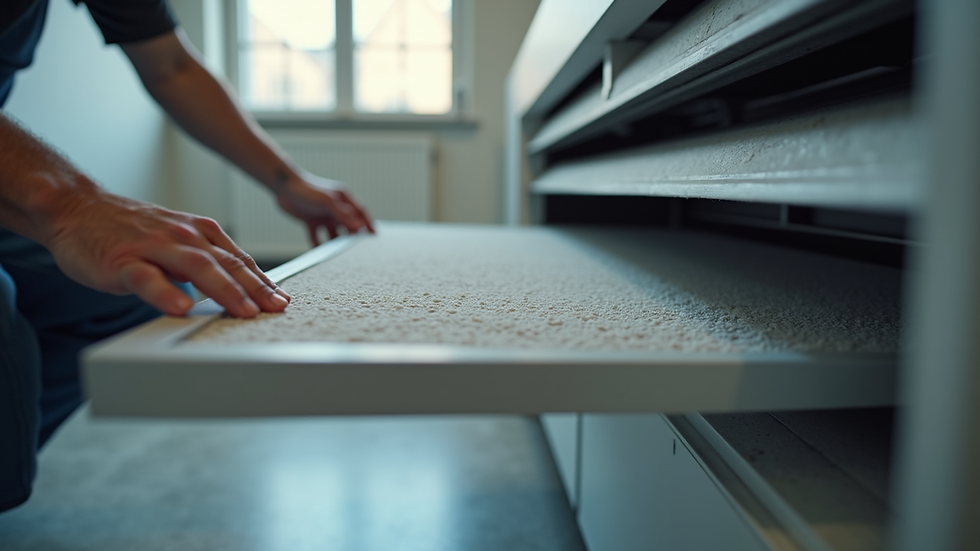
Inspect ducts for leaks and blockages
Your HVAC Maintenance routine isn’t complete until you check the air pathways. Ducts act like the arteries of your home’s climate system; if they are clogged or leaking, your unit works harder to push air through damaged routes. This inefficiency drives up energy bills and leaves rooms uncomfortably warm or cold.
Start with a visual inspection of all accessible ductwork, particularly in basements, attics, and crawl spaces. Look for disconnected joints, crushed sections, or gaps where the metal meets the insulation. A simple touch test can also reveal issues: if you feel air escaping from a seam while the system is running, you have found a leak. Seal small gaps with mastic sealant or metal-backed tape, avoiding standard cloth duct tape which degrades over time.
While you can handle visual checks and minor sealing, professional duct cleaning is a different matter. If you notice excessive dust buildup around vents or suspect mold growth inside the ducts, hire a certified specialist. They use industrial-grade vacuums and agitation tools to remove debris that a DIY approach simply cannot reach. Regular professional cleaning every few years, combined with your own visual checks, ensures your HVAC Maintenance plan keeps air flowing cleanly and efficiently.
Schedule professional HVAC maintenance
Some tasks require tools and expertise that go beyond a homeowner’s toolkit. A certified technician can safely handle refrigerant recharge, electrical diagnostics, and motor lubrication—tasks that, if done incorrectly, can void warranties or create safety hazards. Think of this annual tune-up as a physical exam for your home; it catches small issues before they become costly breakdowns.
What the technician checks
During a professional HVAC maintenance visit, the technician will perform a comprehensive inspection. They will check refrigerant levels to ensure proper cooling efficiency, inspect electrical connections for tightness and corrosion, and lubricate moving parts to reduce friction and wear. They will also clean the evaporator and condenser coils, inspect the condensate drain line for clogs, and test the thermostat calibration. This thorough process ensures your system runs efficiently and safely throughout the summer.
Why annual service matters
Skipping professional maintenance can lead to higher energy bills and unexpected repairs. A well-maintained system uses less energy, saving you money on utility bills. It also extends the lifespan of your HVAC equipment, delaying the need for a costly replacement. Regular service helps identify potential issues early, such as worn belts or failing capacitors, allowing for proactive repairs rather than emergency fixes.
Look for a licensed and insured HVAC contractor with positive reviews. Check for certifications from organizations like NATE (North American Technician Excellence) to ensure quality service.
Book your appointment in early spring. Technicians are busiest during heatwaves, so scheduling ahead ensures you get a convenient time slot and avoids potential delays.
![9 HVAC Maintenance Tips Every Dallas Homeowner Needs [2026]](/cdn/articles/c3d57d3a-4c0b-4982-9bbc-b822cce204c6-2a5b85f5.jpg)
Clear debris from around the outdoor unit and ensure easy access to the indoor furnace or air handler. Have your previous maintenance records ready for the technician.
Common hvac maintenance: what to check next
Understanding the basics of HVAC maintenance helps you catch small issues before they become expensive repairs. Regular upkeep, like changing filters and cleaning coils, keeps your system running efficiently and extends its lifespan.
What maintenance should be done on HVAC?
Standard HVAC maintenance includes changing air filters, cleaning evaporator and condenser coils, checking refrigerant levels, and inspecting the thermostat. It also involves ensuring proper airflow by cleaning ducts and checking for leaks or blockages. These steps maintain system efficiency and prevent unexpected breakdowns during peak summer heat.
What is the $5000 rule for HVAC?
The $5,000 rule helps homeowners decide whether to repair or replace their HVAC system. Multiply the age of your unit by the cost of the needed repair. If that number exceeds $5,000, replacing your HVAC system is often more cost-effective than continuing to fix an aging unit.
What is the 20 rule for HVAC?
The 20-degree rule states that you should keep your AC unit at no more than 20 degrees lower than the outside temperature. For example, if it is 95°F outside, set your thermostat to no lower than 75°F. This prevents the system from overworking, which can lead to premature wear and higher energy bills.
Quick checklist
-
Match the sizeMake sure the HVAC Maintenance option fits your household, storage space, and normal batch size.
-
Check the materialChoose a material that handles heat, washing, and regular use without becoming a chore.
-
Plan the cleanupAvoid anything that needs more maintenance than you are likely to give it.
-
Keep one fallbackHave a simple backup option for rushed days.
No comments yet. Be the first to share your thoughts!