

Start with the air filter
The air filter is the most critical DIY maintenance step for your HVAC system. A clogged filter restricts airflow, forcing your compressor to work harder and consume more energy. This restriction can lead to frozen coils, overheating, and premature component failure. Replacing this simple part is the first line of defense against expensive summer breakdowns.
How to replace your HVAC air filter
Follow these steps to ensure your system breathes freely during peak heat.
When to replace your filter
Standard 1-inch pleated filters should be replaced every 30 to 90 days. Homes with pets, high dust levels, or allergy sufferers should check monthly. During the intense heat of summer, airflow is more critical than ever, so err on the side of caution. If your filter is dark gray or black when you remove it, replace it immediately regardless of the schedule.
Quick maintenance checklist
-
Turn off thermostat
-
Remove old filter
-
Check airflow arrow direction
-
Insert new filter snugly
-
Restart system
Choosing the right MERV rating is also important. A MERV 8 to 11 filter is generally sufficient for most residential systems, balancing filtration quality with airflow resistance. Higher MERV ratings (13+) may restrict airflow in older systems, so check your manufacturer's guidelines before upgrading.
Clear debris around the outdoor unit
The condenser unit on your patio or backyard needs room to breathe. When leaves, grass clippings, or overgrown shrubs pile up against the metal fins, the fan struggles to pull in cool air. This forces the compressor to work harder, driving up your electricity bill and risking a breakdown during the peak of July.
Start by turning off the power to the unit at the disconnect box or breaker panel. This is a non-negotiable safety step before you reach in with your hands or tools. Once the power is cut, remove large debris by hand. Pick out twigs, leaves, and grass clumps that have accumulated inside the protective cage. Be gentle—bending the delicate aluminum fins reduces airflow efficiency.
After clearing the bulk of the waste, use a garden hose to spray the fins from the inside out. This pushes trapped dust and pollen back through the unit rather than deeper into the coil. Avoid high-pressure nozzles, which can bend the fins flat. Finally, trim back any vegetation at least two feet away from the unit. This clearance zone ensures consistent airflow and makes future maintenance easier.
Check thermostat settings and calibration
Your thermostat is the control center for the entire HVAC system. If it reads incorrectly, the system will cycle on and off unnecessarily, wasting energy and wearing out components before the summer heat peaks. Accuracy here prevents the "short cycling" that drains efficiency.
Verify the mode and temperature
Before testing calibration, ensure the thermostat is set to Cool mode, not Heat or Auto. Set the temperature 3–5 degrees below the current room temperature. If the AC does not kick on within a few minutes, the issue may be electrical or mechanical, not just calibration. If it runs continuously without reaching the set point, the system may be undersized or have a refrigerant leak.
Test for calibration drift
Place a separate, reliable thermometer next to the thermostat. Wait 15 minutes for the readings to stabilize. Compare the thermostat display to the external thermometer. If the difference is more than 2 degrees, the thermostat is drifting. This misalignment causes the AC to shut off too early, leaving the home uncomfortably warm while the thermostat thinks the job is done.
Recalibrate or replace
Many digital thermostats have a built-in calibration offset in the settings menu. Adjust this value to match the external thermometer. If your unit is analog or lacks this feature, a 2-degree error often signals internal sensor degradation. In that case, replacement is cheaper than continued energy waste. Use a model with smart scheduling to automate adjustments during peak heat hours.
Check placement and sensors
Ensure the thermostat is not in direct sunlight or near heat-generating appliances. Even a well-calibrated unit will fail if placed in a hot spot. If your home has multiple zones, verify that the thermostat is located in a frequently used, central area rather than a hallway or corner where air doesn’t circulate freely.
Inspect ductwork for leaks
Unsealed ducts act like a leaky bucket, wasting cooled air before it reaches your rooms. This inefficiency forces your HVAC system to run longer, driving up summer electricity bills and straining the compressor. A quick visual inspection of accessible ductwork can reveal obvious gaps, disconnected joints, or crushed sections that need immediate attention.
Check accessible duct joints
Focus your inspection on the joints where duct segments connect, particularly in basements, attics, or crawl spaces. Look for visible gaps between the metal sheets or where the duct connects to the main trunk line. These connections are the most common failure points because thermal expansion and contraction loosen the seals over time. If you see daylight shining through a seam, air is definitely escaping.
Inspect flexible duct connections
Examine the flexible insulated ducts that branch out to individual rooms. These sections often suffer from loose clamps or torn insulation. Ensure the metal band clamps are tight around the foil tape or sealant. Torn insulation exposes the inner liner to dust and debris, reducing airflow efficiency. Re-tighten loose clamps with a screwdriver and replace any severely torn sections to maintain proper air pressure.
Seal identified leaks
Once you have located the leaks, use mastic sealant or aluminum foil tape to seal the gaps. Avoid standard cloth duct tape, as it dries out and peels off under high temperatures and humidity. Apply mastic with a brush for larger gaps, ensuring it covers the entire seam. For smaller joints, wrap aluminum foil tape tightly around the connection. This simple step can significantly improve cooling efficiency before the peak summer heat arrives.
Schedule professional HVAC services
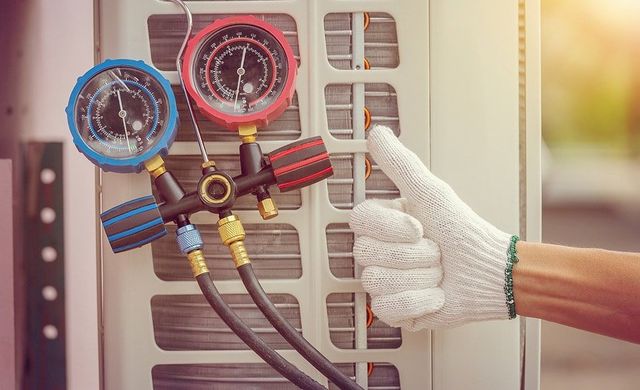
DIY filter swaps and coil rinses handle the surface, but they leave the complex mechanics exposed. As summer heat intensifies, the strain on your system grows. A certified technician brings the specialized tools and safety training required to manage high-voltage components and pressurized refrigerant lines.
Professional maintenance goes beyond visual inspection. Technicians perform precise refrigerant level testing to ensure your unit operates at peak efficiency. Incorrect refrigerant charges can lead to compressor failure, a repair that often costs thousands. They also tighten electrical connections and check for wear on contactors and relays, preventing unexpected breakdowns during peak heat.
Scheduling this service before the first heatwave ensures availability. Many homeowners wait until their unit stops working, leading to long wait times and emergency pricing. An annual tune-up provides a comprehensive health check, identifying minor issues before they become major repairs.
Use the $5000 rule for repairs
When an aging AC unit needs fixing, the $5000 rule helps you decide whether to repair or replace. Multiply the repair cost by the age of your system. If the result exceeds $5000, replacement is usually the smarter financial choice. If it falls below that threshold, a repair is likely worth the investment.
For example, a 10-year-old unit needing a $600 compressor repair yields $6,000 ($600 × 10). Since this exceeds $5000, replacing the unit makes more sense. You get a newer, more efficient system with a fresh warranty. A 3-year-old unit with the same $600 repair costs $1,800 ($600 × 3). In this case, repair is the better option.
This rule accounts for two factors: repair cost and equipment age. Older systems often require frequent repairs as components wear out. Even if a repair keeps the unit running, efficiency drops over time. Newer models use significantly less energy, which can offset the replacement cost through lower utility bills.
Common hvac maintenance: what to check next
Getting the seasonal tune-up right keeps your system running efficiently through the peak summer heat. Here are answers to the most frequent questions homeowners ask before calling a technician or tackling a task themselves.
What is needed for HVAC maintenance?
Basic maintenance requires a few simple tools: a vacuum cleaner for debris, a coil cleaning brush, a screwdriver set, and a 45-degree fin comb to straighten bent cooling fins. You will also need a new air filter and a can of compressed air to clear out the outdoor condenser unit. For deeper checks, a multimeter and a manometer help verify electrical safety and refrigerant pressure levels.
What is the $5000 rule for HVAC?
This rule helps you decide between repairing an aging unit or replacing it entirely. Multiply the cost of the needed repair by the age of your air conditioner. If the result is greater than 5000, replacing the AC is generally the smarter choice. If it's less than 5000, a repair might still be worth the investment.
How often should I replace my HVAC air filter?
Standard fiberglass filters need replacement every 30 days, while pleated or high-efficiency filters can last up to 90 days. If you have pets, smoke indoors, or live in a dusty area, check the filter monthly. A clogged filter restricts airflow, forcing the compressor to work harder and driving up your electricity bill.
Why does my AC blow warm air?
Warm air usually points to a refrigerant leak, a dirty evaporator coil, or a failing compressor. Start by checking if the outdoor unit is blocked by leaves or dirt. If the unit is clean and the filter is new, the issue likely requires professional diagnosis to prevent further damage to the system.
No comments yet. Be the first to share your thoughts!